

What Did We Do?
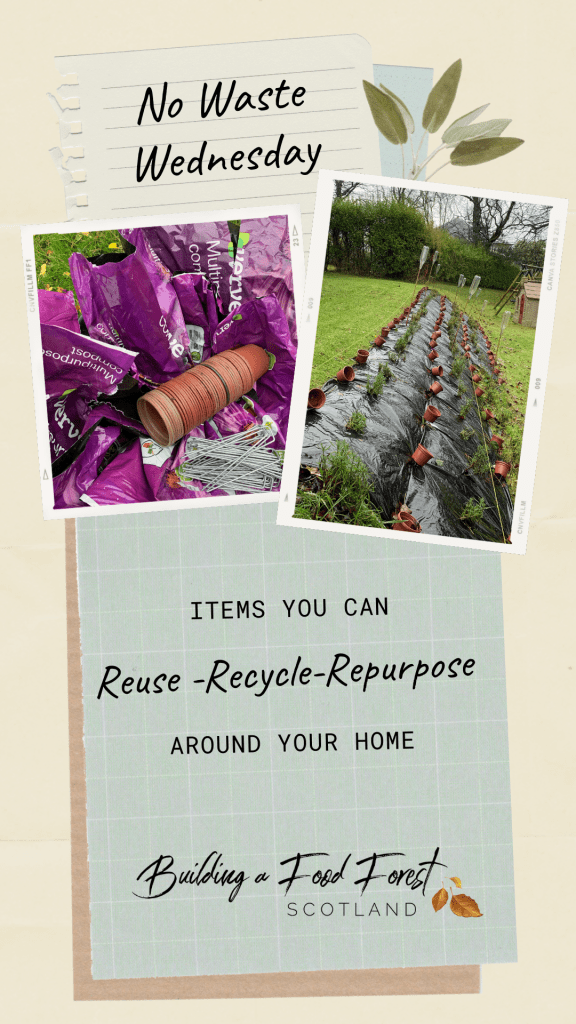
We had used a few ready made compost bags around the garden this last year and rather than throw away these bags , I started to look around for usages.

I could have just turned them inside out & used them to make leaf mould in, the black sides would have attracted the heat & made the process go faster.
I could have kept them to use as liners inside hanging baskets with holes poked in.
But I decided to use them to sort out the grass on the slope of the lavender hedging which I had planted last year as 2 things happened since I planted them:
1. I didn’t clear the grass fully, I just cut it really short, as I thought the lavender would bush OUT rather than go straight UP so would kill off the grass (noob mistake!)
2. I did not plan on the grass growing so quickly and having to be cut weekly with hand shears!! Worst & most time consuming job of this year for sure!
I was not going to be doing that next year. I tried cardboard sheeting it inbetween but it would just slide off or get caught by the wind no matter how wet & pinned down it was. I tried mulching too but the slope is so steep everything just got piled up at the bottom when it rained.
Obviously looking back should have sorted this out first before planting….learning process for sure!

What Do We Do?
I started by cutting both ends of the bags
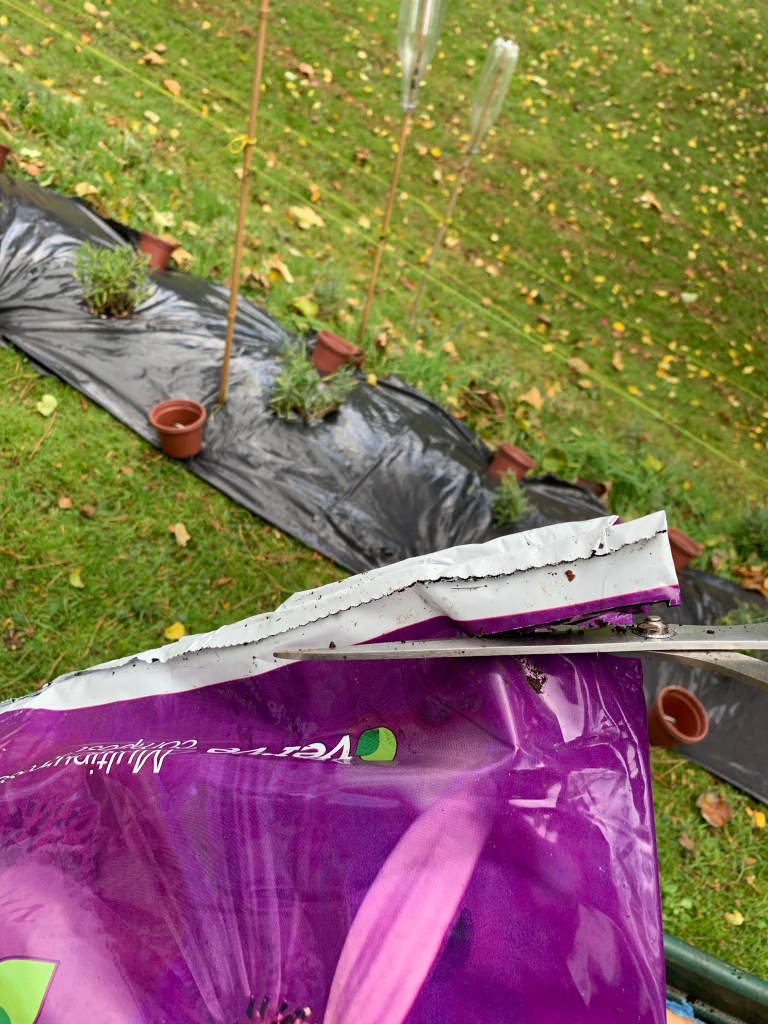
Then cutting it straight up the back to form a flat piece of bag

This gave me a large section to work with. I repeated this with all the bags I had collected over the last year. I don’t like throwing things away.
How Did We Attach Them?
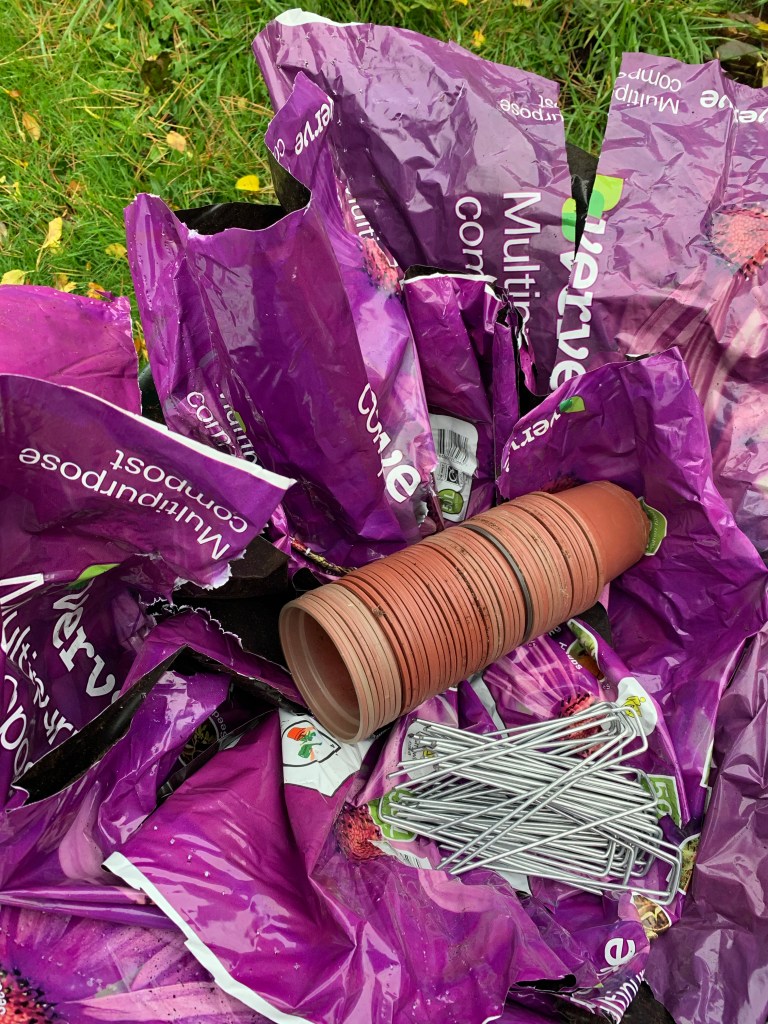
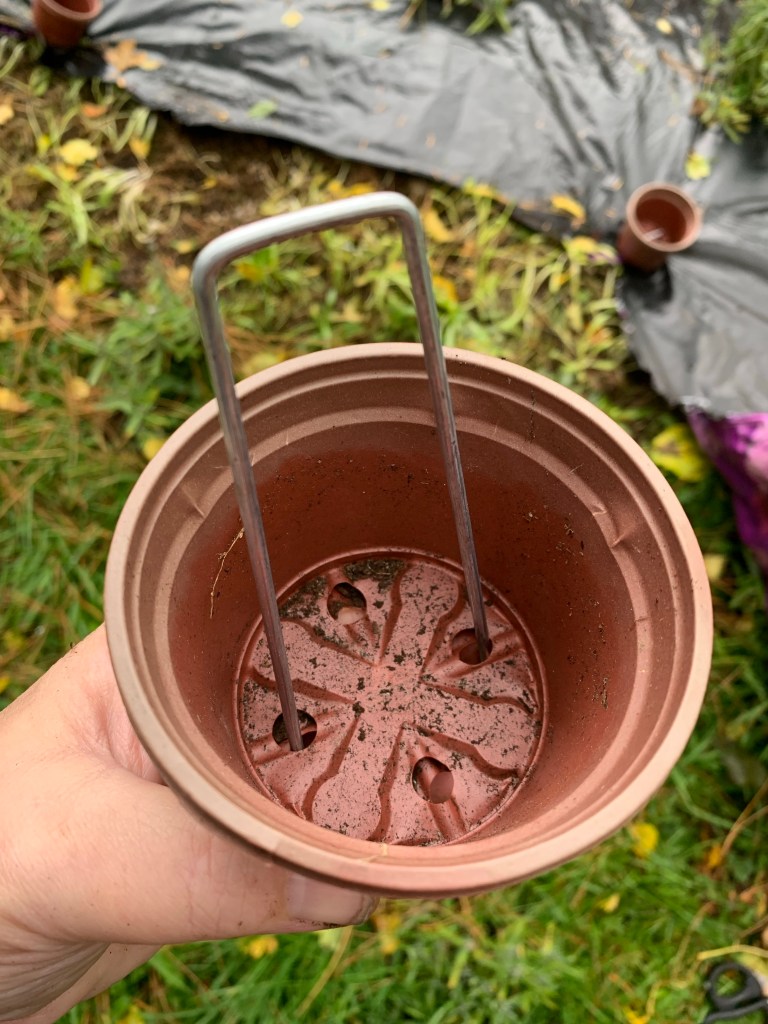
I had used just pegs & cardboard on this area but the pegs after a while just ripped straight through the cardboard and were no longer holding anything in place. So I decided to use these pots to hold the pins in place, so they wouldn’t rip through the plastic bags as they already had holes in the right places I needed.
My alternative was to use yoghurt pots I had collected & punch/drill holes in, but these worked just as well. I doubled them up as they were thinner than yoghurt pots & I didn’t want to take any chances of going outside after a stormy night to see plastic flying around everywhere! That would have defeated the object of reusing-recycling-repurposing.

Once I had everything ready to go I started pinning in the top of the first sheet/bag using the peg pots.

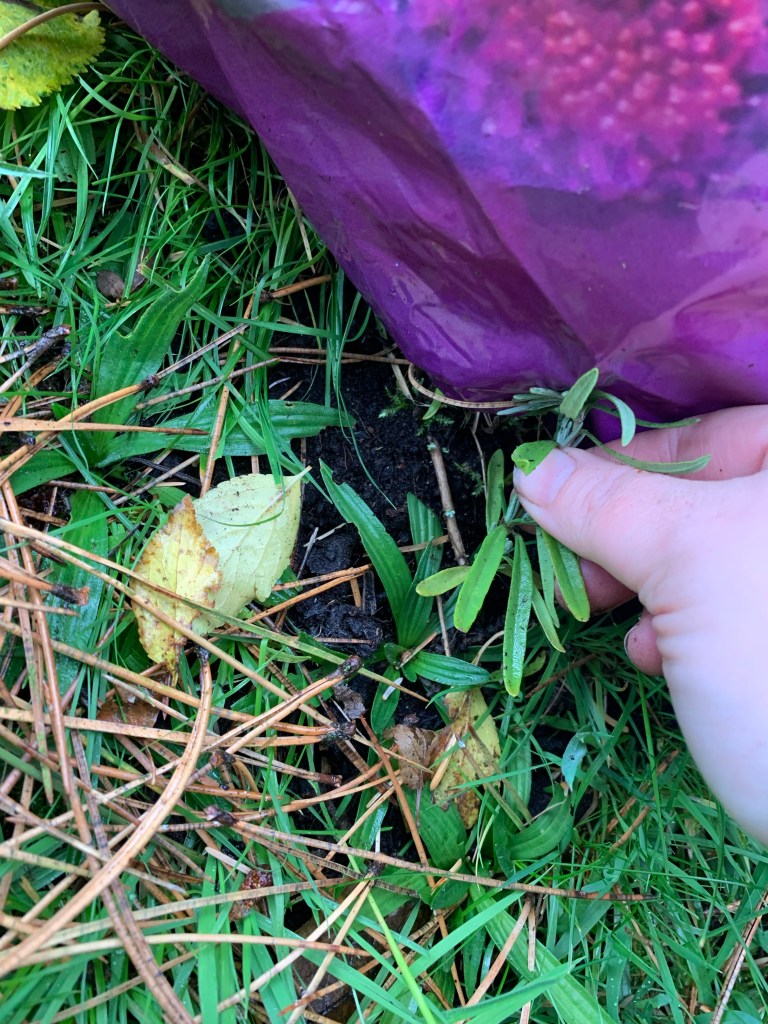
Once I had peg-potted the 2 corners of the bag at the top. I then made small slits where the lavender was sitting by holding the bag down tight & using scissors to cut an X where the bump was

I then fed the lavender through the hole. I did this for all the lavender under this bag. Peg-potted the other 2 bottom corners down & moved onto the next bag sheet.
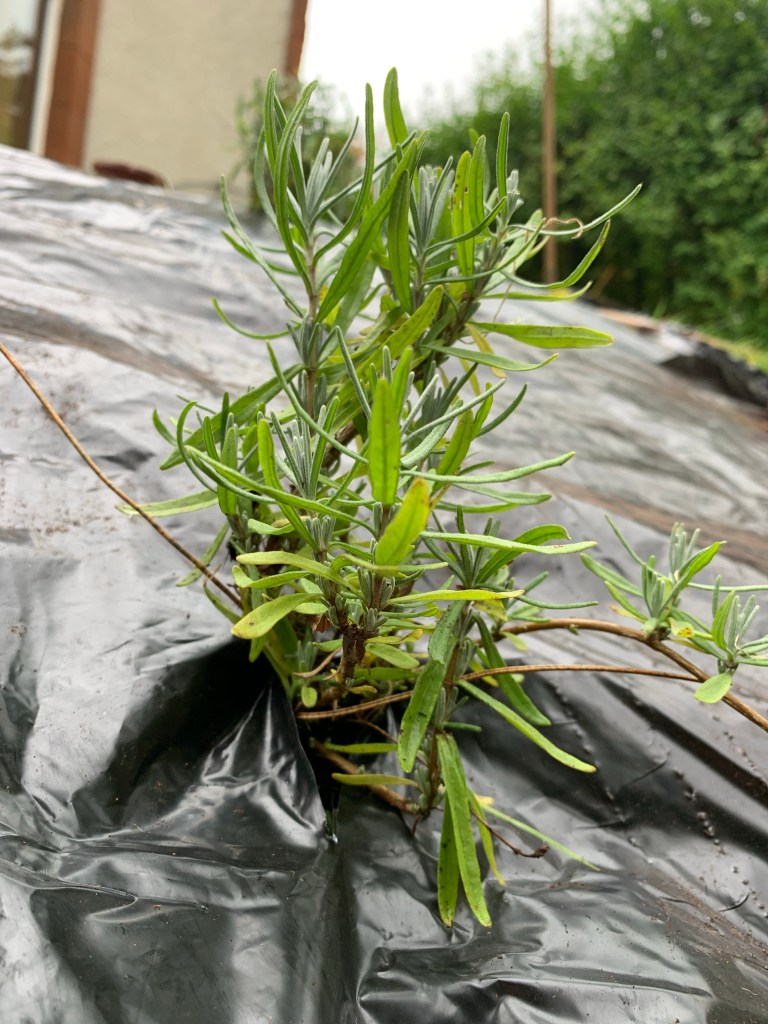
Lavender sits nice & neat ontop of the bag.
I continued doing this 1 bag sheet at a time, by taking the previous top corner peg-pot out & putting the next sheet underneath & peg-potting it back in carefully using the holes I had already made from first pushing the peg-pot in.


Once I finished a section, like this. I went back and added extra peg-pots into the centre of each, edge top & bottom giving each bag 6 peg-pots.
Maybe didn’t need to be so cautious as this but as it was on a slope I wanted to make sure the wind wasn’t going to get underneath it and lift it up.
Getting It Finished
As with everything I do it takes a couple of sessions to finish anything. Usually because I am teaching & guiding Clayton at the same time so things just take longer, he or I get tired or the Scottish weather creeps in!
Here is some progress photos. I still need another 5 to completely finish it.

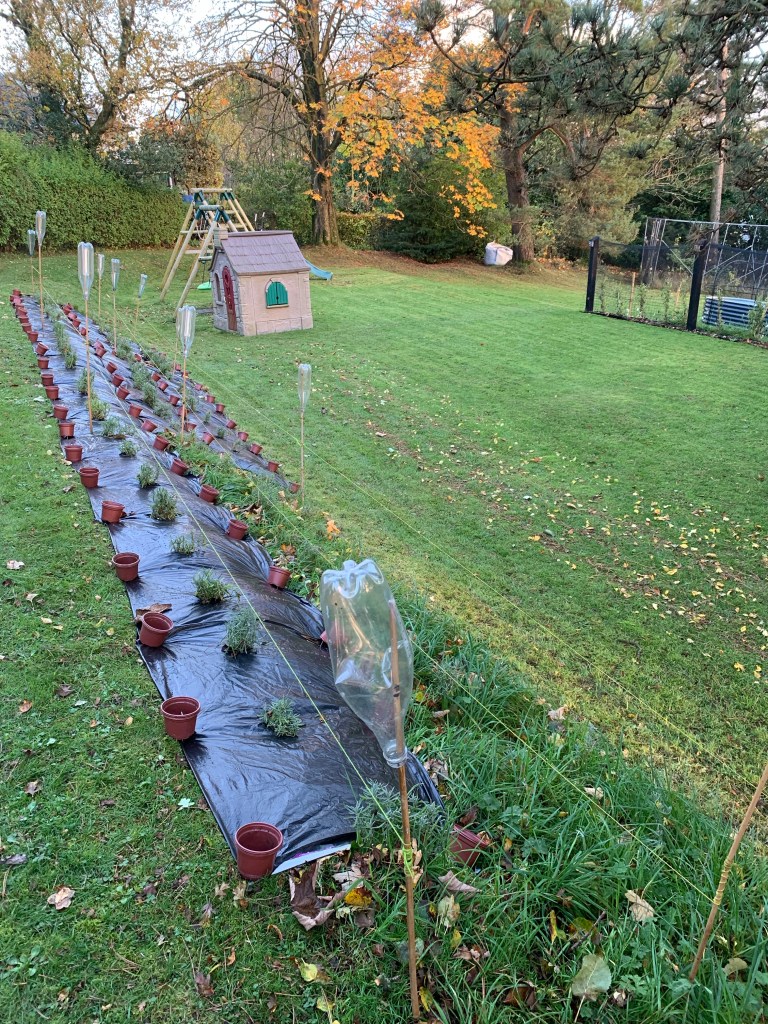
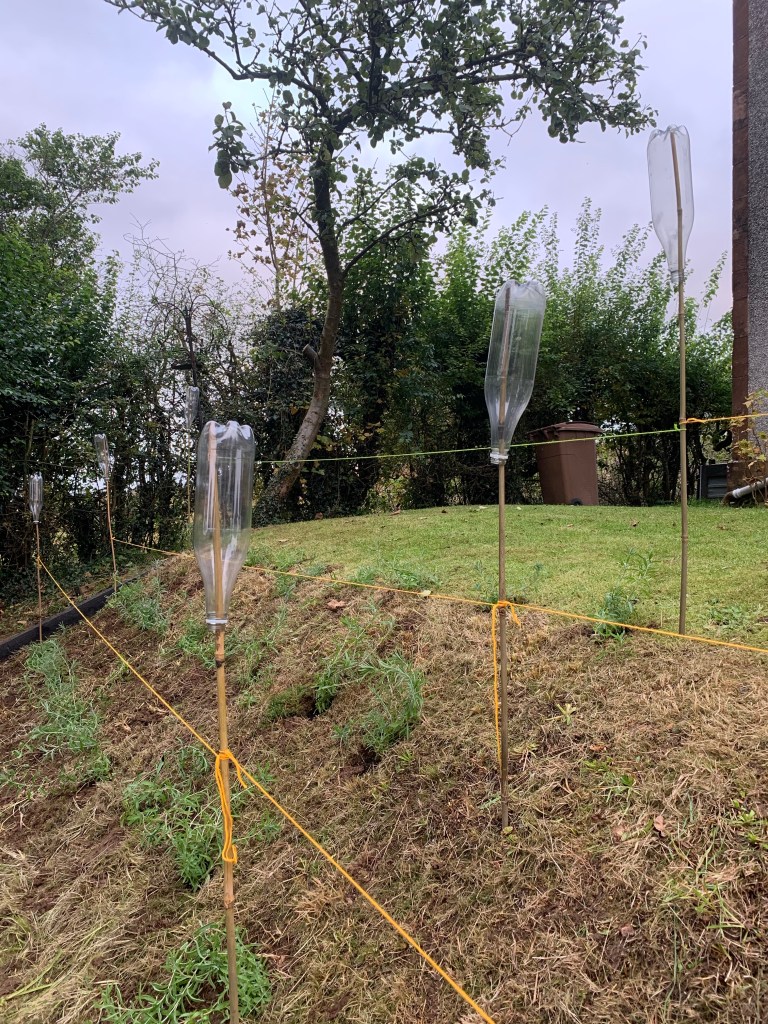
Incase you were wondering what on earth the bamboo sticks, bottles & string is all about!
Initially the bamboo sticks with the string was a guide line to get the lavender all in neat rows when I first planted up the 90 odd plants (all grown from seed during lockdown) The bottles just a simple way of stopping any accidents happening from falling on the sticks.
They got left up because the bottles rattle when the wind blows and it scares the Deer so they tend to not stay “too long” and usually just run straight across AND I really like the noise too, it’s really calming like a wind chime. It also stopped anyone going super close to the edge and falling down, kinda like a visual warning too. They’ll get moved once the hedge gets established

(1st slope by the house)


This covers Permaculture Design principle No7. Produce no waste. We aim to reduce as much as we can to produce no waste from what we are consuming. Starting by reducing.

Top 5 Reasons To Try This
1. To reduce waste that goes to the landfill
2. To kill off & suppress any grass & weed growth
3. Save money on buying store bought products for the job
4. Reduce the need to buy any plastic sheeting, there are also many alternatives to plastic sheeting
5. As always the best reason. It’s free. It’s being reused-recycled-repurposed.
Love, Katrina & Clayton

Katrina & Clayton and family live in East Ayrshire and share their daily life in the garden on instagram. They practice permaculture principles in the garden, reducing & repurposing waste whenever they can. Katrina shows how home educating in nature has helped Clayton thrive.
Clayton Completed The 2 Grow and Learn Courses with the Royal Caledonian HorticulturalSociety This Year. Clayton has just turned 17, Autistic, Non Verbal & has been Home Educated for the last 7yrs. Katrina & Peter both hold their PDC (and PDC PRO) Permaculture Design Course from Oregon State University
They featured on BBC Beechgrove Gardens Ep23 2022 and returned in 2023 for an update,Katrina & Clayton are also columnists for ScotlandGrows Magazine, Guest Blog for Caledonian Horticulture as well as working with Gardeners’ World Magazine and many other brands. They are also Authors of the new children’s book: Clayton’s New Garden Journey: A Story of Autism and Growing available on Amazon

Author of the New Children’s Book Series: Clayton’s Garden Journey: A Story of Autism and Gardening Including Our Growing, Harvesting and Sowing Stories
& Our 108 Page Sowing, Growing, Weather and Seasons Weekly Gardening Record Book All Available on Amazon


Get Weekly Blogs Straight To Your Inbox
This blog is from the No Waste Wednesday Blogs
Other related blogs are:

Discover more from Building a Food Forest -Scotland
Subscribe to get the latest posts sent to your email.

A good post! Thank you 😊🌍
LikeLike
Thank you for your kind words – Katrina
LikeLiked by 1 person
You are welcome, Katrina
LikeLike